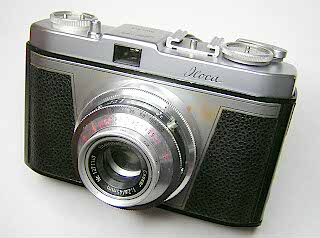
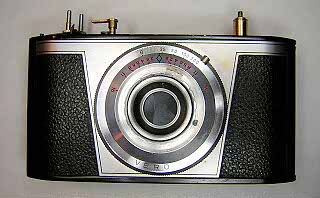
Iloca Rapid
A German viewfinder camera made in the 1950s by Wilhelm Witt. There were several
variants of this camera as well as a Rapid B rangefinder version.
The Rapid has a unique left-side wind lever that allows winding with the left hand while
firing the shutter with the right hand. Hence the "rapid" designation. Apart from the winder,
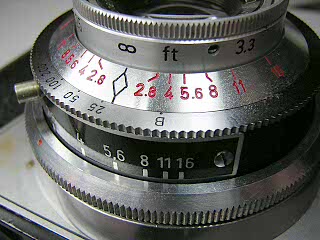
this is a fairly typical scale-focusing viewfinder camera from the 1950s. It has one of the
AGC shutters, (Prontor, Pronto or Vero), and Steinheil Munchen triplet lens (Cassar or Cassarit).
This particular camera has a Cassar lens and Vero shutter.
The lens on my camera was cracked so I wasn't able to
take any pictures with it. However, I've used other cameras with this lens and it
produces good pictures.
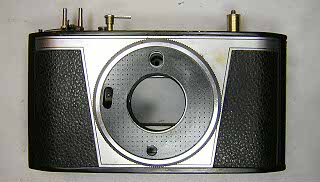
To open the back, lift the rewind knob as far as it will go and turn the knob clockwise.
This will activate a spring that pops open the back.
|
|
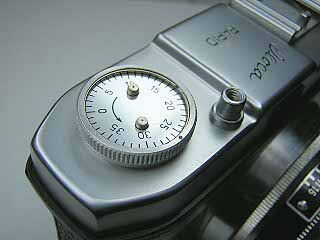 |
To remove the top cover, look closely at the film counter dial and you see a spring
clip holding the dial in place. Remove the spring clip with a small screwdriver or pick.
The dial then can be lifted off. Usually the dial is a tight fit and won't fall out.
I use a piece of masking tape to lift the dial up far enough to get a screwdriver underneath
the dial. The dial is very soft aluminum and easily scratched, so it's not a good idea
to try and pry it out directly. Remove the screw underneath the counter dial.
|
 |
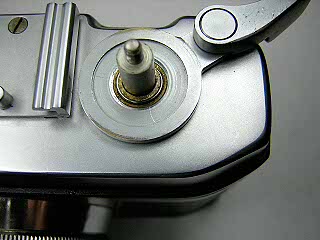
Open the back then hold the rewind fork while unscrewing the rewind knob.
The film reminder cover on the rewind knob can stay on. If you need to remove it
for cleaning, remove the spring clip like the one on the film counter dial.
|
 |
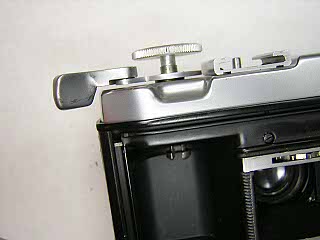
Remove the spring clip around the rewind shaft and lift the wind lever off.
Remove the screw found under the wind lever and the top cover will then lift off.
As always, watch for shim washers and the shutter release button that will fall out
The viewfinder is held in place against the top cover by spring metal pieces.
Remove the springs and the parts to the viewfinder will come loose.
|
 |
With the top removed you can see the winder mechanism spread across the top of the camera.
Usually this can be cleaned if needed without disassembly. To wind the camera with the
top cover off, just replace the wind lever on the rewind shaft tube. Note the three tabs
on the bottom of the wind lever that fit into slots in the large cam around the rewind
shaft base.
|
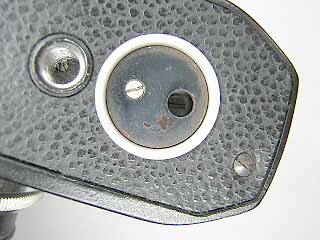 |
To remove the bottom, first remove the label on the rewind release button. The label
is just glued on. Put a drop of alcohol or lacquer thinner around the edge
of the label to soften the glue then use a knife blade or small screwdriver
to pry the label up. (On this camera the label was already missing.)
Underneath the label is a screw and hole. Don't remove the screw as it just
holds the parts of the rewind relase together. Insert a scredriver into the
hole and remove the screw at the bottom. The release will then lift out of the
bottom plate.
Remove the two screws at each end and the bottom.plate will lift off.
Note that the rewind release has a spring inside that puts pressure against
the film takeup spool shaft. With the release removed, the winder won't operate
the takeup spool. You can push on the bottom of the shaft with a finger if you
need to operate the winder with the bottom cover off.
|
 |
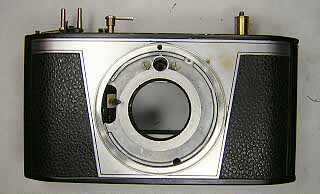
To get access to the shutter, set the focus to the infinity position, then
back out the setscrews in the focusing ring. Lift the focusing ring off.
Mark the infinity position of the lens and then unscrew both the front and
center lens elements.
On many cameras of this type with front focusing lenses, the grease in the
lens helicoid is completely dried out and may make it impossible to unscrew the
lenses. Try adding a little bit of oil to the dried out grease to soften it. All
of the old grease has to be removed. This often involves soaking the lens
barell in solvent and then running a toothpick or needle through the screw
threads.
|
 |
Turn the lock screw until the flat side faces towards the center and then
unscrew the wavy retaining nut. The faceplate and speed cam will then lift off.
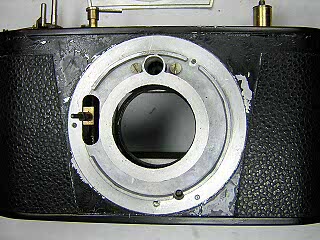
If you need to remove the shutter for complete disassembly, just remove the
retaining ring in the back by reaching in through the film gate.
See the article on the Vero shutter for further
disassembly and cleaning.
|
 |
The remaining parts of the front are decorative and usually don't
need to be removed unless for replacement. However, if you need access to the
release shaft, you will need to remove them.
The black plate is held in place by a spring clip. Pull the clip out
and lift the plate out.
|
 |
Remove the decorative base.
|
 |
The front panel is glued on. Pry it off carefully. The metal is thin brass
and is easily bent. Note the plastic shim under the front panel. Be sure to reinstall it.
|
 |
The base is held by three screws from the back. Remove the two long
screws on the left of the film gate. Note that the screws are slightly different.
The third screw is located on the right of the film gate next to the
film takeup spool. With the three screws removed you can pry the base off.
Don't remove the two screws you see on the front. These hold the bracket that
holds the shutter wind pinion against the winder rack.
|
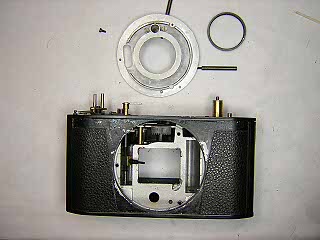 |
This picture shows the front of the camera with all the front pieces removed.
|
If you removed the shutter for cleaning you may find it difficult to
get the shutter wind pinion back into place against the winder rack. The
rack has to be pulled back towards the rewind shaft while the wind shaft
pinion is rotated against the pin on the back of the shutter as far as possible.
If the first tooth of the rack doesn't sit on the pinion, the wind stroke will
not push the shutter wind shaft far enough to latch. It may be easier to
remove the winding parts on top down to the rack so that you can lift the
rack up and set it into the proper position. (That's what I had to do anyway.)