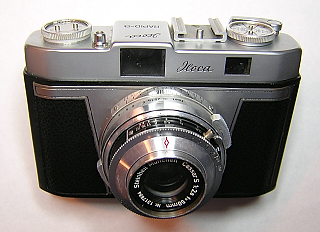
Iloca Rapid B
A German rangefinder camera made in the 1950s by Wilhelm Witt. There were several
variants of this camera. Some were sold by Montgomery Ward as the Photrix while others
were sold by Sears Roebuck as the Tower 51. The Rapid B is similar to the Iloca Rapid,
but adds a rangefinder and a unit focusing lens with a rear helicoid.
The Rapid cameras have a unique left-side wind lever that allows winding with the left hand while
firing the shutter with the right hand. Hence the "rapid" designation.
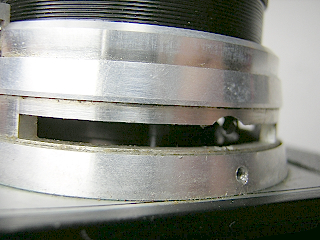
To open the back, lift the rewind knob as far as it will go and turn the knob clockwise.
This will activate a spring that pops open the back.
|
|
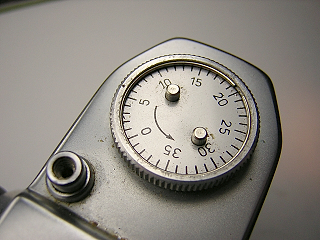 |
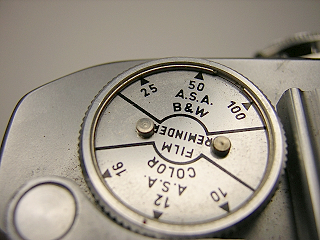
To remove the top cover, look closely at the film counter dial and you see a spring
clip holding the dial in place. Remove the spring clip with a small screwdriver or pick.
The dial then can be lifted off. Usually the dial is a tight fit and won't fall out.
I use a piece of masking tape to lift the dial up far enough to get a screwdriver underneath
the dial. The dial is very soft aluminum and easily scratched, so it's not a good idea
to try and pry it out directly.
|
 |
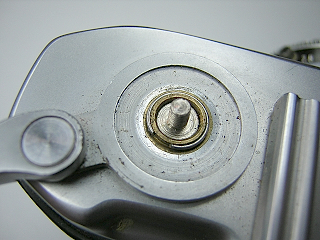
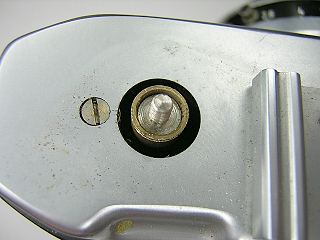
With the dial removed you can access and remove the screw holding the right side of the top cover.
|
 |
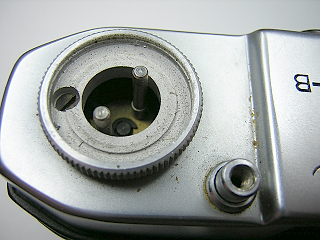
Open the back then hold the rewind fork while unscrewing the rewind knob.
The film reminder cover on the rewind knob can stay on. If you need to remove it
for cleaning, remove the spring clip like the one on the film counter dial.
|
 |
Remove the spring clip around the rewind shaft and lift the wind lever off.
|
 |
Remove the screw found under the wind lever and the top cover will then lift off.
As always, watch for shim washers and the shutter release button that will fall out
|
 |
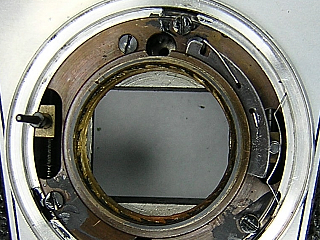
With the top removed you have access to the rangefinder. The lenses and pivoting mirror can
be cleaned in place. Don't attempt to clean the beamsplitter. Like most beamsplitters from
the 1950s, the silvering will come off the glass with the slightest touch. Even holding it
under running water is usually enough to remove the silvering. If the beamsplitter is too
hazy to use or has fungus, you have to replace it. The beamsplitter is just glued in place.
I replaced the one on this camera with a part from a junk Konica C35. Although the replacement
was slightly smaller, it only has to be big enough to cover the area shown in the
viewfinder.
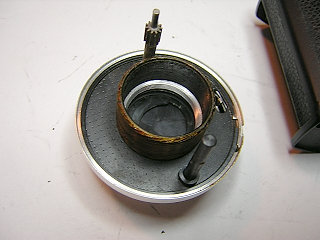
To remove the rangefinder, remove the three screws around the base and lift the
whole assembly off.
|
 |
The pivoting mirror is on the left next to the rewind shaft. The two screws are
used to make adjustments. Note the gap in the base. It looks like there should be
an eccentric screw there to make adjustments, but on neither this camera or a Photrix
that I have seen is this screw in place.
To adjust the horizontal matching, you loosen the large screw in the back and shift the
position of the mirror bracket. The front screw is used to adjust the vertical matching.
I could not locate any access holes in the top to allow making adjustments with the
top cover on. Unfortunately, part of the viewfinder lens is mounted into the top cover.
As a result, you have to remove the top cover, make an adjustement, then replace
the top cover to see the results. Very tedious...
|
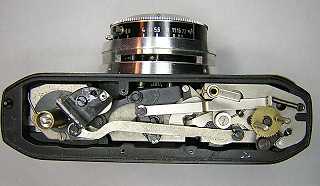 |
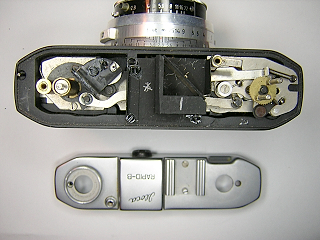
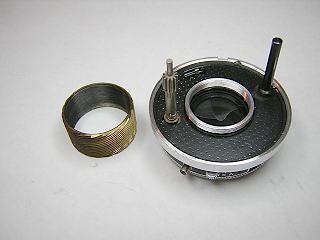
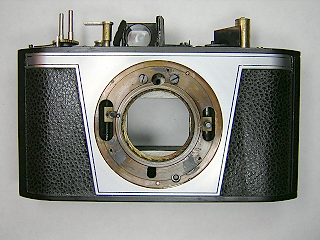
With the rangefinder removed, you can see the winder mechanism spread across the top of the camera.
Usually this can be cleaned if needed without disassembly. To wind the camera with the
top cover off, just replace the wind lever on the rewind shaft tube. Note the three tabs
on the bottom of the wind lever that fit into slots in the large cam around the rewind
shaft base.
|
 |
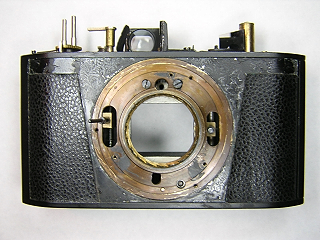
Note that none of the mechanism is under the bottom cover. Unless you
need to remove the film takeup spool, there isn't any reason to remove the bottom.
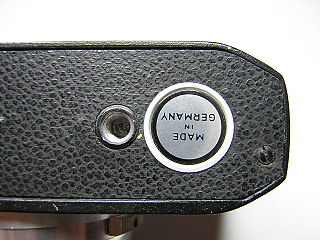
To remove the bottom, first remove the label on the rewind release button. The label
is just glued on. Put a drop of alcohol or lacquer thinner around the edge
of the label to soften the glue then use a knife blade or small screwdriver
to pry the label up.
|
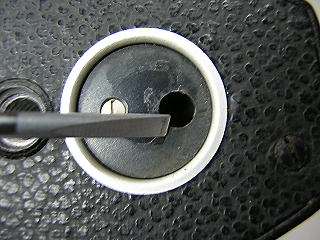 |
Underneath the label is a screw and hole. Don't remove the screw as it just
holds the parts of the rewind release together. Insert a screwdriver into the
hole and remove the screw at the bottom. The release will then lift out of the
bottom plate.
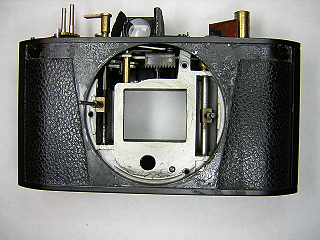
Remove the two screws at each end and the bottom.plate will lift off.
Note that the rewind release has a spring inside that puts pressure against
the film takeup spool shaft. With the release removed, the winder won't operate
the takeup spool. You can push on the bottom of the shaft with a finger if you
need to operate the winder with the bottom cover off.
|
 |
You can get access to the shutter for flush cleaning from the front. Unscrew the lens
then turn the lock screw until the flat side faces inward and then unscrew the wavy
retaining ring. The faceplate and speed setting cam will lift off.
Disassembly and cleaning the Prontor SVS shutter is described on another page.
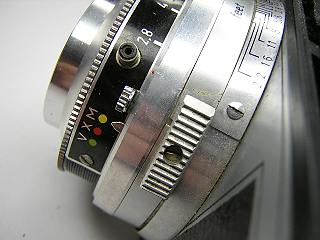
To remove the shutter from the camera, first remove the screws in the focussing knobs
then remove the knobs and the focus scale.
|
 |
With the focus scale off, you can see a slot in the focus ring. There is a screw
with a half-round head located where the gap is rounded. This is where you need
the special tool described above. Optionally, use small needle nose pliers to
turn the screw.
Turn the focus to the closest (3ft) position. Loosen the half-round screw until the
focus ring will turn without moving the lens. Turn the focus ring back to the infinity
position, then re-tighten the screw. Repeat these steps until the inner helicoid separates
from the outer helicoid and the shutter lifts off the camera.
If the grease in the helicoid has dried out to the point where you can't
turn the focus, you will have to find some way to get oil or solvent into
the helicoid first. You can see the end of the helicoid when looking through
the film gate. That's probably the best place to add oil.
Reinstalling the shutter is the opposite of the above process. Keep screwing the
parts together until they won't go down any further. The post on the back of the shutter acts as the infinity stop, so until the
shutter is set back on the camera, the focus ring has nothing to limit its movement.
Be sure you have the focus ring in the 3ft position before starting assembly.
To set the focus, turn the focusing
ring until the image is sharp when focused at infinity. Loosen the half-round screw
and turn the focusing ring to the infinity position then tighten the screw.
|
 |
Turn the shutter over. The inner helicoid is screwed into the shutter. If you haven't
already done so, remove the rear lens. Grab onto the helicoid with a soft-jaw plier or
other suitable tool and unscrew it from the shutter. Be very careful not to damage
the thread or distort the brass helicoid.
|
 |
Remove the circular spring clip around the edge and then lift the black back plate off.
Pull the pin from the shutter wind stem and the pinion will lift off. Note how the pin
only sticks out of the shaft on one side. When reinstalling the pin make sure it doesn't
extend out on both sides or it will bind the pinion.
|
 |
Loosen the half-round screw until the clamp around the helicoid can be lifted off then
remove the clamp and then remove the focus ring.
|
 |
Look closely at the spring and cam on the right side of the helicoid. The spring
pushes the RF cam follower against the cam. The two legs of the spring fit into grooves
in the base ring. The cam sits in a grove in the helicoid and is held in place by
the spring attached to the cam. Remove the spring and the cam.
There is a post on the back of the black plate attached to the focusing ring that engages the RF cam (previous picture).
This post has to be inserted into the cam and the spring on the cam has to be inside of the post.
Remove the three screws holding the base ring to the base and the setscrew
from the outside, then lift the ring off.
|
 |
The front panel is glued on. Pry it off carefully. The metal is thin brass
and is easily bent.
|
 |
The base is held by three screws from the back. Remove the two long
screws on the left of the film gate. Note that the screws are slightly different.
The third screw is located on the right of the film gate next to the
film takeup spool. With the three screws removed you can pry the base off.
The outer helicoid unscrews from the base. When removing, note the starting
position and count the number of turns it takes to remove. When reinstalling
the helicoid, screw it back in the same number of turns and stop at the
original position. This will make resetting the focus easier.
The two screws you see on the front hold the bracket that
holds the shutter wind pinion against the winder rack. There is no reason
to remove this bracket unless you need to replace it.
|
 |
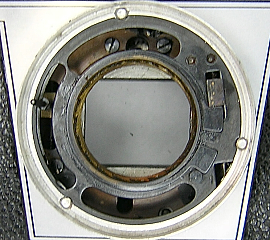
This picture shows the front of the camera with all the front pieces removed.
|
If you removed the shutter for cleaning you may find it difficult to
get the shutter wind pinion back into place against the winder rack. The
rack has to be pulled back towards the rewind shaft while the wind shaft
pinion is rotated against the pin on the back of the shutter as far as possible.
If the first tooth of the rack doesn't sit on the pinion, the wind stroke will
not push the shutter wind shaft far enough to latch. It may be easier to
remove the winding parts on top down to the rack so that you can lift the
rack up and set it into the proper position.
The screws in the accessory shoe screw into a plate under the top cover. When the
screws are removed, the plate will fall off. Don't remove those screws unless you intend to remove the top cover.