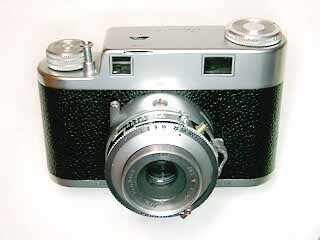
Iloca IIa
A German rangefinder camera made in the 1940s and '50s by Wilhelm Witt.
The Iloca IIa is an improved version of the original Iloca I camera.
The IIa has a coupled rangefinder instead of the simple eye-level viewfinder
of the earlier models, and like the Ia has a body release and double exposure
prevention mechanism. The shutter is a Prontor SV and the lens is a Ilitar f/3.5 triplet.
Film is loaded through the bottom of the camera using a removable spool.
This is a small, quaint camera that will take good pictures if properly cleaned
and adjusted.
The shutter must be manually cocked with a lever on the top of the shutter housing.
The shutter release button is blocked until the film is wound and the mechanism that
blocks the shutter and releases the film wind knob is driven by the film
sprocket wheel. Thus, once you cock the shutter, it normally isn't possible to release the
shutter without film in the camera. If you get one of these cameras in that
condition, look at the right side of the
shutter and see if there is a small slot where the original release lever was placed.
It is possible to release the shutter by inserting a small screwdriver into the slot
and pressing down on the shutter release lever inside the shutter. Alternately,
you can remove the depth of field plate on the back of the camera body and then
have access to the film sprocket to turn it by hand.
Unfortunately, whoever had this camera before me didn't understand this and had attemtpted to
force the shutter cocking lever back to its original position. This badly bent
the shutter catch and the stud on the shutter drive ring that must pass the
self timer. I had to completely disassemble the shutter and carefully bend
everything back in place before the shutter would work. In addition, they
had forced the self timer and broken the clutch spring. So, the self timer
doesn't latch. (Perhaps, I can fix that later if I find the right spare shutter
parts.)
|
|
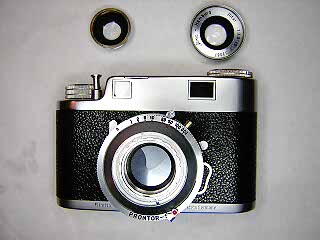 |
The front lenses unscrew from the shutter. The front and center elements may
unscrew together, or they may separate when you unscrew the front element.There are
no spanner slots on either lens, so use a friction tool to remove them.
With the front lens elements removed, you can unscrew the scalloped retaining
nut, remove the faceplate and speed setting cam to get access to the shutter
clockworks for cleaning.
See the articles on the
Vero and
Prontor SVS shutters for information on cleaning.
The Prontor S is similar to both.
|
 |
To remove the top cover, you unscrew the rewind and wind knobs, then lift and tilt
the top back sligthly to clear the rewind release lever. The rewind knob unscrews
counter clockwise, but the wind lever is a LH thread and must unscrew clockwise.
Because this is a bottom film loading design, there is no easy way to get
hold of the rewind and wind fork to block them while unscrewing the knobs. I've
found three ways to go at this.
1) Remove the bottom and then reach up from the bottom with needle nose pliers
or a screwdriver to hold the fork while unscrewing the knob. If you only need
to remove the top cover for rangefinder cleaning and adjustment, this is the
best option.
2) Remove the depth of field table from the back, then slide a small screwdriver
or wooden stake in alongside the film opening to reach the winder and rewind fork.
3) Separate the outer shell from the body casting (see below). This allows direct access
to the forks and if you are going to remove the shutter from the camera anyway,
is the best way to do it.
When reassembling the top cover, make sure the film counter is properly seated
in its ratchet. Turn the counter dial by hand until it drops into place.
|
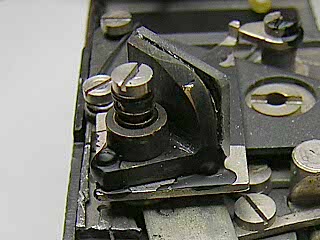 |
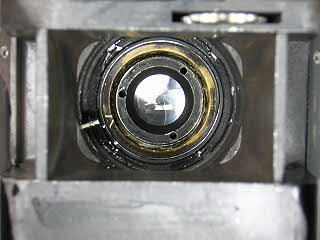
This is a closeup of the rangefinder adjustments. Adjusting the rangefinder
can be difficult since part of the viewfinder lens is located in the top cover.
For horizontal adjustment, first slightly loosen the setscrew located at the back
of the moving mirror. Then, move the mirror back and forth until the images align.
Retighten the screw and seal it in place.
Vertical matching is affected by turning the collar behind the pivoting
mirror. This is located underneath the spring behind the mirror.
The cam at the front (upper right in the picture) can be moved to adjust the rate of change.
This picture shows the cam position at the closest focus position (about 4ft)
|
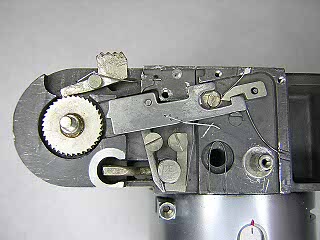 |
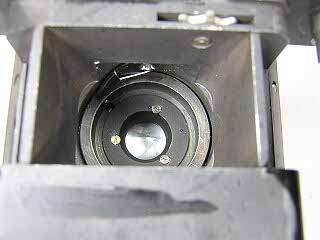
This picture shows the double exposure prevention and auto winder stop parts. Note
how some of these are held in place by flat metal springs embedded in the body.
|
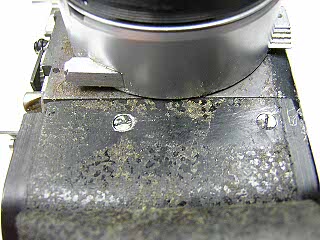 |
To remove the outer body shell, peel back the leatherette
on the front to uncover the four screws on the front. Remove these screws and then
slide the body shell down and off the main body.
|
 |
To remove the shutter from the camera, you have to unscrew the shutter retaining
ring on the back of the shutter. On non-rangefinder versions of this camera,
this is simply a matter of inserting a spanner into the film opening. However,
the IIa is a rear focusing lens with the rangefinder coupling on the back of the
shutter. Thus, you have to first remove the rangefinder parts in order to
gain access to the shutter retaining ring.
Begin by removing the follower. Remove the screw in the cam on the top of the
camera that pushes the pivoting mirror arm and lift the cam off. Note the position
of the cam in relation to the pivoting mirror arm. It should be close to flush
with the end of the arm at the closest focusing position.
WIth the cam off, push down gently on the shaft to the follower arm until
you can unhook the spring. Pull the follower down and lift it out.
Next, remove the three screws in the rear lens and lift off the cover plate.
You can now lift up the plate that couples the focus lever to the rear lens
and rangefinder.
|
 |
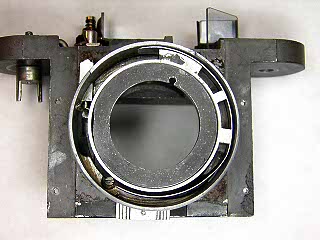
With the rangefinder parts out of the way, unscrew the rear retaining ring
and the shutter will lift off the camera.
|
 |
If you need to remove the focus ring, reach in through the lens opening
and unscrew the focus drive stud from the focus knob. You can then lift
the focus ring and scale out. The outer tube is held by two screws which
are then acessible.
|
Notes
To adjust the lens focus, turn the lens until it is sharp at infinity.
Loosen the three screws in the rear lens and then turn the focus ring
against the infinity stop.
|