Argus A2F
|
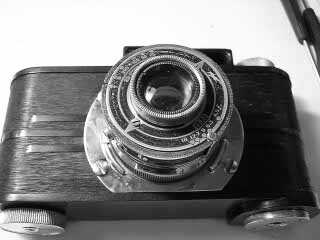
The Argus A series were the first inexpensive 35mm cameras. Most of the A series had a fixed focus, telescoping lens and four speed Ilex shutter. The original Argus A lacked a tripod mount and had only a single film sprocket. Over time, several variations of the Argus A were developed. The camera shown here is the A2F, one of the last variants in the series. It has a focusing lens and an extinction meter.
To remove the back you press down on the "button" next to the latch then lift off the back using the leather tab attached to the back. The latch can be very stiff. When replacing the back, be careful not to bend the latch. The film cassette goes on the right with the takeup spool on the left. To wind the film to the next frame, you first push the release button on the top sideways then turn the wind knob on the left. After the knob has been moved a little bit, you need to release the button so that you don't accidently wind too far. To rewind, you hold the release button aside and turn the knob on the right bottom of the camera.
The Ilex shutter is the self-setting type. There is no need to cock the shutter.
|
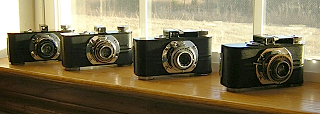
Left to right: Original Argus A without tripod socket and single film sprocket, Later Argus A, Argus A2B, Argus A2F
|
More information on early Argus cameras can be found at the Argus collectors group website.
 |
It is usually possible to clean the shutter without removing it from the camera. See the article on the Ilex shutter page.
|
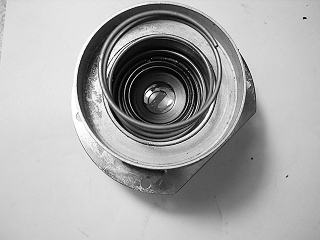 |
To remove the shutter from the camera, remove the back and unscrew the retaining ring through the film gate. However, on the A2F, there is a spring that sits against the retaining ring and it can be difficult to turn the retaining ring without removing the whole assembly first.
To remove the telescoping assembly, remove the four screws in the front chrome plate. The plate and spring will lift out. There is a velvet light seal inside the body cavity. This seal will usually come out with the spring. Reinstall it by gluing it in place with a little contact cement or glue. The seal goes towards the front of the camera.
To disassemble the focus helicoid on the A2F, remove the setscrew located in the ring with the distance indicator mark. Unscrew the ring and then unscrew the focus ring. On one of these cameras I worked on, the setscrew wouldn't come out. I managed to put grease back into the focus from the back by pushing the grease in along the guides. This worked fine.
|
 |
The rear eyepice is held by a spring clip. Slip a small screwdriver behind the clip and pry it out. The eyepiece should fall out.
The front eyepiece lens is usually held in by glue. Normally, the glue is dried out and if you push gently from the back with a cotton swab, the lens will come out. Optionally, you can just clean the front lens in place by reaching in from the back with a cotton swab. On some versions, the front eyepiece lens is held by a clip like the one on the rear lens.
|
 |
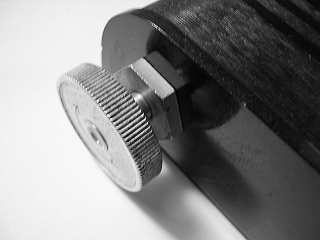
To remove the wind shaft, first remove the screw and knob on the top.
|
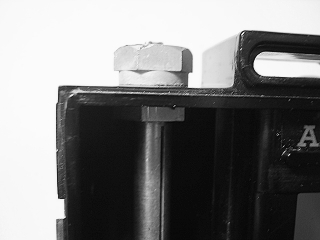 |
Hold the lock nut inside the camera, and unscrew the hex nut on the top. Lift out the spring underneath the hex nut.
|
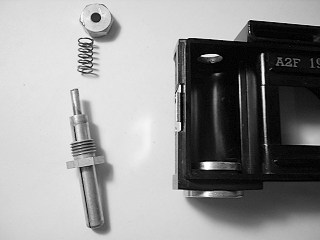 |
With the hex nut out, lift up and then out on the wind shaft.
|
 |
To remove the rewind knob, pull the knob away from the camera bottom and unscrew the hex nut underneath. Lift the knob and wind fork out.
|
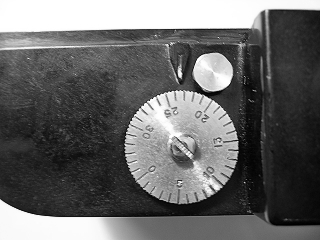 |
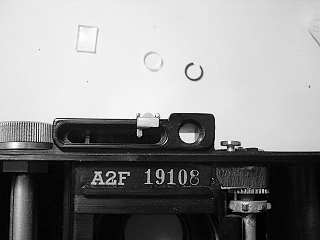
To remove the counter, remove the screw in the middle of the dial and lift the dial off. There is a spring washer and bushing underneath.
To remove the release button, simply unscrew it.
|
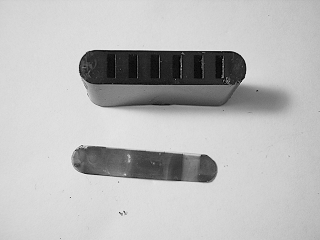 |
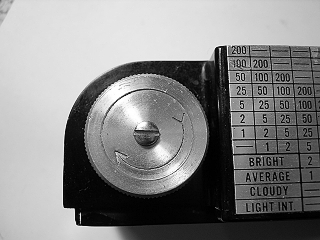
The extension meter slides out from the front. The guide is held by glue but will usually just slide out since the glue dries out over time. Take note of the orientaion of the meter before removing it. The lightest area goes to the left as you look in from the back.
|
Notes
If the film sprockets won't turn freely, there may be oxidation and dirt around the ends of the shafts or the film counter may be sticking. With the winder release button and film counter removed, you can squirt some solvent down onto the end of the shaft then blow it out with compressed air. Gently turn the sprocket with your finger to see if it will move freely. Be careful trying to turn the sprockets if they are stuck. The sprockets are simply stuck onto the shaft with friction and if you force them they can break loose.
|