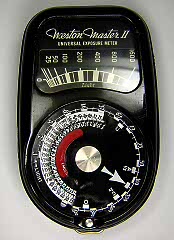
Weston Master II
Many of my old classic cameras lack a built-in light meter. When I shoot film in these cameras I use a meter that was in wide use back when these cameras were made. That meter is the old standby Weston Master II. This meter uses a seleium cell and has two ranges. The door on the back pops open for low light and is closed in bright light. All in all the meter works very well. The readings it gives are consistent with the meter on my Nikon FE2. Best of all, this meter only cost me $10.
Using the meter is very simple. To start, you have to set the emulsion speed. Press the button at the bottom of the meter and then push the little tab that sticks out from underneath the main dial until the speed setting you want is visible in the little window. If you can't see the window, turn the main dial until you see it.
To get a light reading, hold the meter in front of you parallel to the ground and read the number the needle points to. Rotate the main dial until the arrow on the dial points at the number and then read the shutter and aperture settings from the dial. That's it. As with any light meter, remember that the reflectivity of the surface you are reading will affect the readings. On any meter, light colored surfaces will tend to give a setting that produces underexposure.
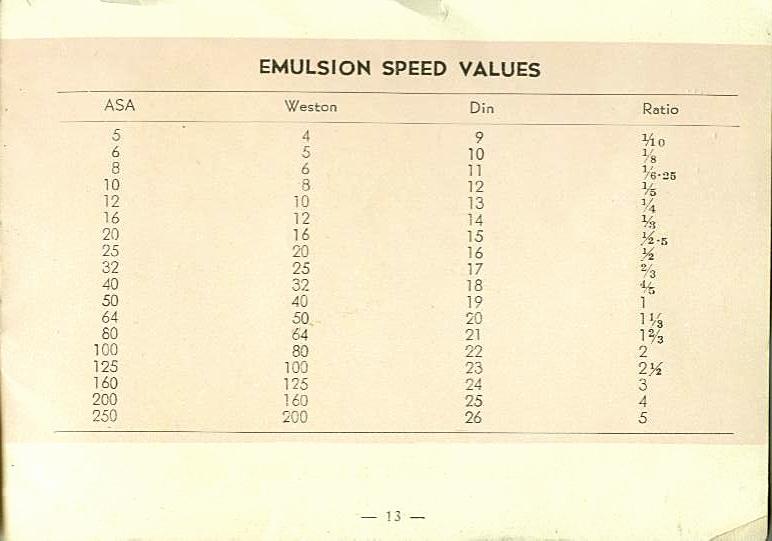
One thing you have to adjust to when using these old meters is the changes in film emulsion ratings over the years. Emulsion ratings were not standard at the time the meter was made and most meter manufacturers came up with their own system and then published charts for the popular films. I have uploaded a 300dpi scan of the chart Weston published for this meter. The changes in emulsion ratings presents a problem if you want to use one of these meters. You need to know what the settings are for modern ASA/ISO speed ratings.
The following image is a scan of a chart I found in the back of a Minolta A camera manual. It shows equivalent values for Weston, ASA and DIN. Note, however, that the equivalent for ASA 100 is DIN 22 on this chart. Today, ASA 100 is DIN 21.
I've found that a setting of 64 on my meter produces good results with TMax 100 film. A setting of 80 works also, but seems to produce slight underexposeure. The best thing to do is to just shoot a roll of test shots using different settings and then use the setting that gives the best negative.
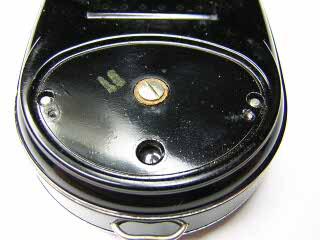
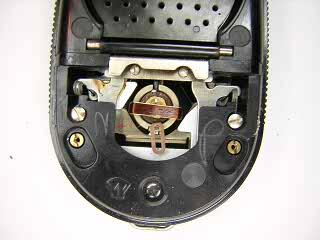
Unfortunately, I dropped the meter one day and the needle jammed. I either had to start using it as a paper weight and get another meter, or try to fix it. As it turned out, the fix to the meter was very simple. The impact had dislodged the coil from its bearings and slightly bent the springs on the needle. All I had to do was pop the coil back in place and then gently bend the spring so that the needle return position was back at zero.
The Weston Master III is supposedly nearly the same as the model II. According to Romney's text, the III has a piece of foil on the back that covers the screws instead of the screwed on plate. You have to poke holes in the foil back to get to the screws.
|
