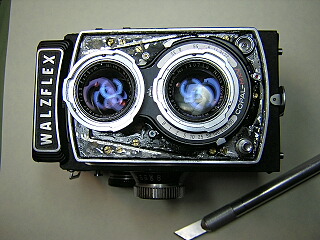
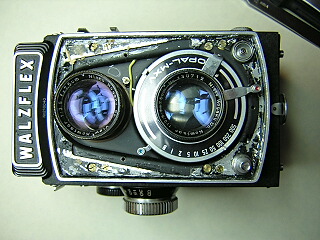
Walzflex IIa
The Walzflex is a typical Japanese TLR from the 1950's. It has a nice lens and excellent Copal shutter in a solid cast aluminum body. The camera shown here is the model IIa. The original Walzflex had the simpler Copal X shutter with a speed range of 1/10 to 1/300 second and lacked the Bay 1 filter mount. The model II added the Bay 1 filter mount and had an improved Copal shutter with speeds from 1 to 1/300 second. The IIa is identical to the II but used the Copal MXV shutter with speeds from 1 to 1/500 second and switchable M/X flash synchronization.
All three models have a film counter with automatic film stop. This was a major improvement over the old red window in the back. The film counter and wind works off a gear next to the takeup spool. You have to have the takeup spool in place in order for the film counter and auto stop winder to work. To load the film, you match the start line on the backing paper with the red dots at the bottom of the film gate. Close the back then turn the wind knob until it reaches 1 and clicks into place. To advance the film, you press in on the center of the wind knob then release. The knob can now be turned to the next frame. The film counter mechanism is one of the weak parts of this design. The ratchet pawl tends to gouge a notch into the winder ratchet making the automatic stop useless. Be gentle turning the winder knob and don't ever force it. The ratchet gear is plate brass and easy to break!
On all the Walzflex that I have, they came with completely frozen focus. To fix the focus you have to completely disassemble the camera, clean out the old lubricants and re-lubricate. These are good cameras and it's definitely worth doing if you have the time and energy
I apologize for the poor quality of these pictures. This was the first camera where I documented the repair with my Nikon Coolpix and I was still working out the lighting and camera setup. If I ever overhaul another Walzflex I'll try to get some better pictures including some close-ups of the focusing parts.
 |
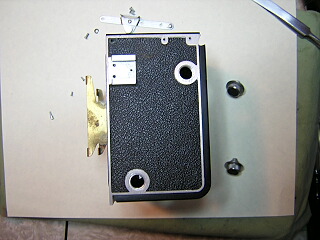
Start by removing the leatherette from the front. The leatherette on these cameras gets brittle and if you try to just lift it off you'll end up with lots of little chips and a ruined covering. The trick is to first heat the leatherette with a hair dryer until it becomes soft and pliable. You can then slip a knife under and slowly work the leatherette off.
Watch out for the metal parts when you do this as they can get quite hot. Even after heating the leatherette it may break off in pieces. Save the pieces and you can glue them back on later. The deep grain pattern does a pretty good job of hiding breaks in the cover.
Remove the Bay 1 filter panel. There are three screws that hold it on. Look at the self timer lever closely and you'll see that the cover has a cut-out that you have to pull out first so that the cover will lift over the timer lever.
|
 |
With the filter panel off you can see eight screws holding the front panels together. Remove the four large screws and the entire front panel will lift off as a single assembly. Watch closely for shim washers underneath the front panel. The shims need to go back exactly where they came from to preserve the focus alignment.
The small screws hold the two pieces of the front panel together. You only need to remove them if you want to take the shutter or viewing lens off to work on it. To remove the shutter, you unsolder the flash wire and unscrew the retaining collar on the rear of the shutter.
|
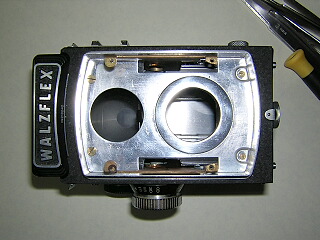 |
Remove the four screws and lift off the aluminum panel. To remove the panel, slide it down and tilt until it clears the focusing rack pieces. It helps to rotate the focus to its minimum focus position. Of course, If the focus isn't working, you may not be able to do this. The nameplate will come loose when you remove the top screws. (It's actually better to remove the top first, but I got things out of order here a little bit.)
|
 |
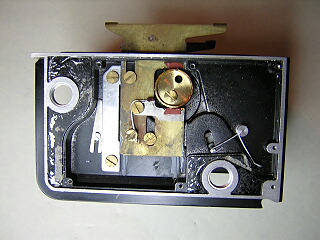
Remove the four screws around the viewing hood and slide it back and up to remove. Underneath you see the reflex mirror. On older models the mirror is held in place by two brackets. On this camera, the mirror is held with some glue. It's a good idea to remove the mirror so that it doesn't get scratched while working on the focus. To remove, you push down on the mirror and then slide it up until it comes out. There is a brass spring holder underneath the mirror that you just lift out.
At the bottom of the mirror you see a brass rod. This is the focusing shaft that connects the left and right focussing cams. There will be a blob of dried out grease at each end of the shaft. This dried out grease is what causes the focus to stick. You can try removing this grease and putting some new lube in. It might be enough to get the focus to move again, but usually you'll have to do the sides as well to get to all the old grease.
|
 |
On the left side, remove the strap hanger and screws in the accessory shoe. The accessory shoe may not come off. It sometimes will be stuck to the leatherette. This is OK.
Peel back the leatherette until you uncover four small screws. The screws are located near the bottom corners and about two-thirds the way up on each edge, just below the accessory shoe. You don't have to completely remove the leatherette here. Just enough to uncover the screws. WIth the screws out you can pry the side panel off. The panel is thin aluminum so be careful not to bend it.
The spool end knobs don't have to come off but I find it's easier to work on the camera if it can lie flat. To remove the knobs just unscrew them. If the knobs are really tight, it's probably better just to leave them alone.
|
 |
Unhook the spring on the tensioner claw, remove the screws
holding the claw and spring and lift them out. Remove the screw in the cam and lift the cam off. Remove the
screws holding the focus rack and slide the rack out through the front.
Don't remove the screws holding the bracket at the bottom of the focusing rack. Just clean this piece in place.
The glue on the rubber bumpers sometimes is dried out and the bumpers fall out. Be sure not to lose
the bumpers. Stick them back in with contact cement.
|
 |
On the right side, first remove the strap hanger.
Next remove the film wind knob. Use a spanner to unscrew the push-in part of the knob and lift it off. There is a spring underneath that comes out. Next remove the screw in the middle of the wind knob and lift the knob off. Remove the three screws on the base and lift the base and wind fork off. Examine the wind fork and you'll see the auto-stop ratchet gear. On all three Walzflex I've worked on this gear has a grove cut in the teeth from the ratchet pawl. If the groove is too deep, the counter won't work right.
|
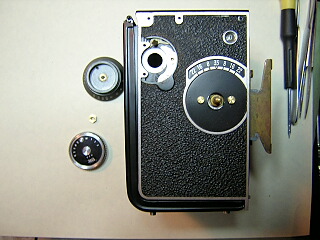 |
Next remove the focussing knob. There is a trick to getting this thing off. The pin-face screw in the middle just holds the film reminder dial in place. You don't need to remove it. The trick is that the focussing knob separates into two pieces. You hold the cone shaped black piece while unscrewing the chrome piece on top. Inside there is a hex nut that holds the knob to the focussing shaft. Sometimes people try to force a stuck focus and end up loosening the hex nut instead. When that happens, the knob will simply spin in place without doing anything. If this happens, try pulling up on the knob whil turning it counter clockwise. This will eventually work the hex nut off and the knob will the lift off the camera.
Now peel up the leatherette to uncover three small screws. Two are near the bottom corners and the third is on the back edge just below the wind knob. With the screws out you can remove the side panel.
|
 |
Lift off the gear that couples the film spool gear to the film counter. Unhook and remove the spring on the counter reset spring. Look at the bracket that holds the coupling gear and you will see
an eccentric bushing held by a screw that adjusts the position so that the gear meshes properly. It's a good idea
to mark the position of this bushing before removal. Remove the screws holding the bracket and lift it out.
Remove the tensioner spring and claw. Now pull the focus cam and shaft out. Remove the screws holding the
focusing rack and slide it out.
The counter dial and pawl can also be removed for cleaning if needed. The screw in the center of the
counter dial controls the tension on the counter dial. You need to retension it so that the dial will
snap back to 0 when the back is opened. Study how the auto-stop mechanism works before taking it apart.
The double pawl has to start at a specific place on the gear under the counter dial for every thing to
work right.
|
Notes
The grease in the focusing mechanism is often dried into something like soft plastic. Normal solvent
doesn't seem to do much to affect it. I found that adding oil to the grease first will soften it enough
to then clean with solvent.
To set the focus, set the lens correctly at infinity then loosen the hex nut that holds
the focusing knob. Turn the knob against the infinity stop and retighten the nut.
|