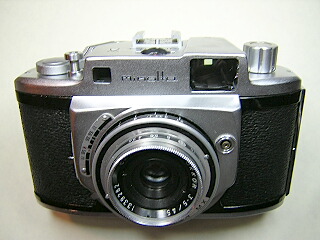
Minolta A
The Minolta A is the first fixed lens 35mm rangefinder from Minolta. The shutter on the Minolta A is unusual. It is a behind the lens design with the shutter speed set with a dial on top of the camera. The actual shutter is a Prontor S shutter mounted with the clockwork facing towards the film. The dial on top of the camera connects to the normal rim-set shutter speed dial through an idler gear. Because of this design, you can't do a simple flush cleaning of the shutter without an almost complete disassembly.
Here are scans of the parts list for this camera:
|
 |
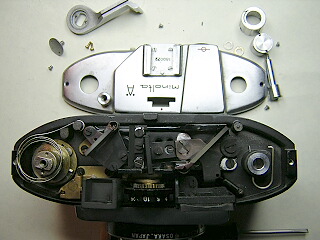 |
Top cover removal
Remove the back and hold the rewind shaft while unscrewing the rewind knob
Remove the pin face screw on the wind knob then lift the knob off.
Remove the screws at each end and the screw in the back of the top cover and lift the cover off
Optionally, you can remove the screws in the rewind knob and separate the two pieces for cleaning. You can also remove the screws in the accessory shoe for cleaning. There is an access hole visible with the accessory shoe removed. This hole allows adjustment of the vertical matching without removing the top cover. Unlike most rangefinders, horizontal alignment is made from the lens and not by moving the pivoting mirror.
|
|
|
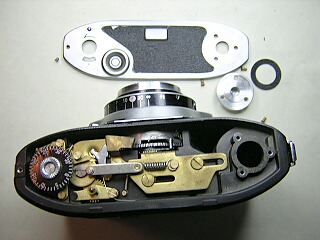
Bottom Cover removal.
Peel off the leatherette around the tripod mount socket and remove the three screws there. Remove the screw on the end of the cover and the cover will lift off.
NOTE: The screw on the film counter dial is LH thread. Turn clockwise to remove it.
|
|
|
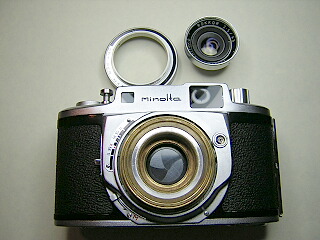
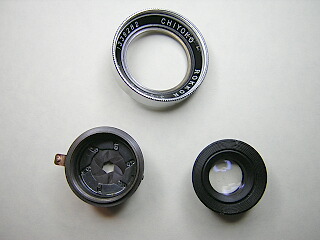
Lens and diaphragm removal.
Before starting, set the focus to infinity.
Remove the three setscrews located in the distance scale and lift the scale off.
Unscrew the lens and diaphragm as a single assembly.
|
|
|
Diaphragm removal.
Unscrew the front lens group and then lift the nameplate out.
The diaphragm sits on the housing for the rear lens element. If you unscrew the rear lens, the diaphragm will fall out with it. It's better to remove the diaphragm first before the rear lens.
|
|
|
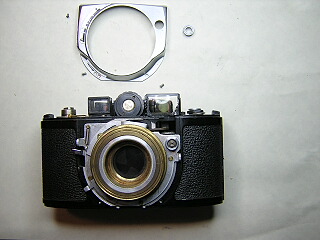
Front plate removal.
Unscrew the ring on the flash connector and then remove the two screws at the bottom of the front cover. Remove the topmost screw on the M/X switch cover plate. Remove the front cover by lifting it up and sliding sideways to clear the M/X switch and M synch cocking lever.
|
|
|
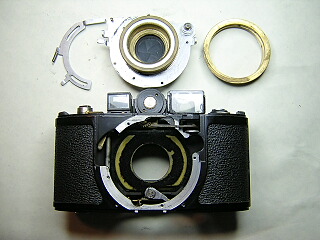
Shutter removal
The focus mechanism has two brass rings around the inner helicoid barrel. The outermost ring is the cam that drives the rangefinder. The inner brass ring is the focus control. You will want to mark the position of the focus across all the rings to make reassembly at the proper focus easier.
Back out the setscrews on the rangefinder cam ring and unscrew the ring. Count the turns as you remove the ring. On reassembly, screw the ring back in the same number of turns.
Unhook the spring on the synch cocking lever, remove the screws and lift the lever off. Lift off the front plate and shutter. You need to tilt the front plate slightly to clear the rangefinder cam follower.
If you need to lubricate the focus helicoid, back out the set screws in the control ring and remove it. Unscrew the helicoid barrel.
|
|

|
Shutter cleaning
Turn the front plate over and you see the shutter on the back. Minolta labeled this shutter the "Optiper" or "Citizen" shutter, but the shutter on this camera is just a Prontor S shutter. Unscrew the serrated retaining ring and the front plate and speed setting cam will lift off. You can flush clean the clockwork without further disassembly. It's a good idea to remove the escapements from the shutter for cleaning. Since the shutter is mounted directly behind the focus helicoid, any stray solvent can run into the helicoid and flush grease out if it also.
To remove the shutter for complete cleaning, unsolder the flash wiring and remove the three screws holding the shutter from the front of the plate. These are the screws that are in the cutouts.
|
Notes
Focus Adjustment
Remove the setscrews on the focus scale and lift it off. Back off the screws on the rangefinder cam and remove it. Adjust the lens focus to correct infinity then loosen the set screws in the focus ring and turn it against the infinity stop. Tighten the set screws.
Rangefinder Adjustment
Set the lens focus to infinity. Back off the setscrews in the rangefinder cam ring and turn the ring until the horizontal matching is correct on a distant object. Tighten the screws.
Winder Tension
The wind shaft is held under tension by a coil spring. When you remove the wind lever the spring tension will cause the shaft to turn slightly. The shaft must be rotated slightly when reinstalling the wind lever. The partial stroke winder ratchet can be a problem. The ratchet is underneath the top cover on the camera body. This ratchet can pop up while working on the camera. It is important to make sure the pawls are sitting in the gear teeth before putting the top cover back on.
|