Compur Rapid
The Compur Rapid is a high quality, German made shutter used on many German rangefinder, folder and TLR cameras.
Several versions of the Compur were made. The shutter shown here has X-synch only without a self timer. Disassembly of
other models is similar to the shutter shown here.
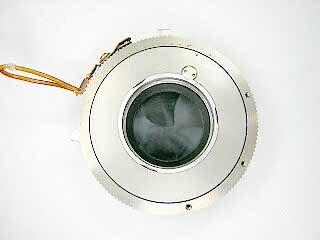 |
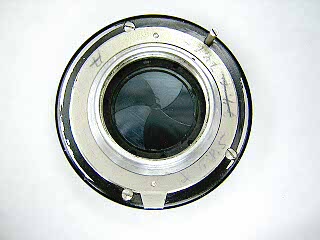
Insert the tips of a tweezer into the two holes in the "button" on the front cover and turn until the flat side faces the center of the shutter.
Rotate the cover counter-clockwise until the tabs match the cutouts in the lens opening.
Insert a small screwdriver into the cutout for the "button" and gently
pry the cover off.
|
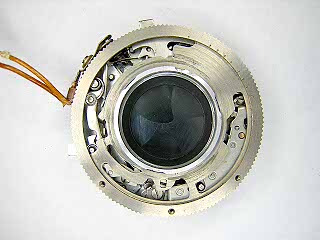 |
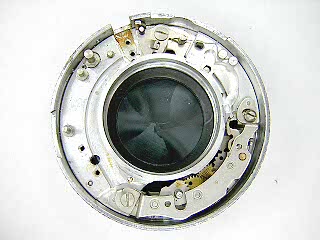
Lift the speed setting ring off the shutter. Note the position of the pins that are fitted into the slots in the speed setting ring.
On reassembly, these pins need to sit in their respective slots.
Note: Once the speed setting ring is off, you should not attempt to wind the shutter.
The center cocking ring will pop up if the shutter is wound or triggered with the cover off.
|
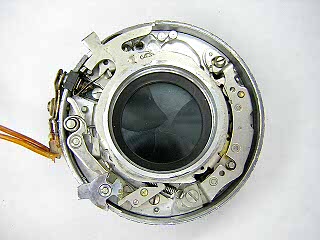 |
Note the position of the cocking ring in relationship to the levers on the slow speed assembly,
latch, B lever, and booster spring. All of these points interact with tabs on the cocking ring
and control the operation of the shutter. On reassembly, you need to insure each of the tabs on the
cocking ring is back in place.
To remove the cocking ring, unhook the spring attached to the end of the slow speed assembly,
lift up and rotate the ring clockwise until the spring is clear.
Remove the shutter trigger. Lift the release lever and high speed spring together.
The release lever has a spring underneath it that sits in a groove in the case.
|
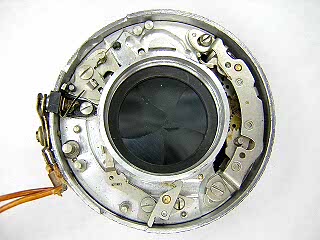 |
Remove the screw in the flash contact and lift the contact out.
Note the position of the spring on the latch, then remove the screw and lift the lever out.
Do the same for the B lever.
|
 |
Unhook, but don't remove, the spring on the blade operating lever. Remove the screw in the
lever and lift the lever out.
Note the slot at the pallet end of the slow speed assembly.
The distance of the assembly from the lens opening controls the position of the pallet
and thus determines the speed of the shutter.
Before removing the slow speed assembly, make a mark around each end.
The slow speed assembly is removed by removing the screws at each end and then lifting the assembly out.
Note: you may want to leave the slow speed assembly in place. Adjusting its position
in order to set the proper speed can be very difficult.
|
 |
Turn the shutter over and remove the screws holding the shutter halves together.
Lift the back off of the inner base. Try to separate the two halves without disturbing
the shutter blades. Note the orientation of the blades, the direction they
overlap, and which blade is placed on last. During reassembly make sure the blades
are replaced in the proper order. Lift the blades off the base. Don't touch the blades
with your fingers during removal or replacement.
Examine the blades closely. On some shutters, you will see one of the blades has its tip slightly bent.
This blade will either be the first or last blade put on depending on how the tip is bent.
|
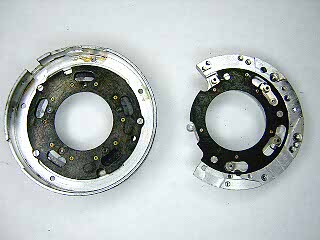 |
The outer base holds the diaphragm. Normally, you should try to flush clean the diaphragm
without removing the blades as the diaphragm can be very difficult to reassemble. If there is
old grease under the operating lever, turn the lever until you see the two screws holding the
lever to the base through the holes in the diaphragm cover. Remove the two screws and the
operating lever will fall off.
The blade activating ring is held to the inner base with three screws. Remove these screws
and lift off the cover and ring.
|
Notes
Speed adjustment is made by moving the slow speed assembly closer or further away from
the lens opening. As the assembly is moved inward, the shutter runs faster. Start by pushing
the assembly in as far as it will go, replace the speed setting ring and then test the shutter
at one second. If the shutter is too fast, move the assembly back slightly. Note that both ends
of the assembly can be moved. Sometimes it is necessary to adjust both ends to bring the shutter
up to speed.
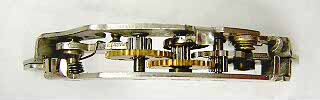 This picture shows the slow speed assembly. Note the three notches at one end and the
spring that is sitting in one of the notches. This spring controls the tension on the speed
gear. Moving the spring will increase or decrease the tension and also affect the speed of the
shutter. You should never attempt to disassemble the slow speed assembly. There is a coiled spring
inside that controls the tension on the gears. This spring is set at the factory and it would
be very difficult to retension the spring properly. In addition, the spring is delicate and
easily broken.
This picture shows the slow speed assembly. Note the three notches at one end and the
spring that is sitting in one of the notches. This spring controls the tension on the speed
gear. Moving the spring will increase or decrease the tension and also affect the speed of the
shutter. You should never attempt to disassemble the slow speed assembly. There is a coiled spring
inside that controls the tension on the gears. This spring is set at the factory and it would
be very difficult to retension the spring properly. In addition, the spring is delicate and
easily broken.
The Compur can usually run "dry" without any lubrication. However, on older shutters it
is sometimes necessary to add a tiny bit of oil to the bearings in the slow speed assembly. This
will help to reduce wear and prevent or overcome any oxidation.
Lubricate the speed setting cam, cover and diaphragm control lever where they rub against each other and the case.
|