Alphax Shutter
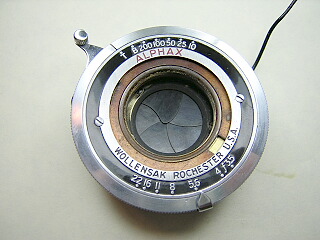
The Wollensak Alphax is an American made shutter used on the Ciro-flex and Argus E TLRs. A smaller version is used on some American made rangefinder cameras such as the Ciro and Bolsey B. The same shutter was sold by Graphex as the Century shutter. There are both synchronized and non-synchronized versions.
The Alphax is a fairly simple design and easy to repair, but nevertheless is usually very reliable.
If the shutter sticks or runs slow, it is almost always due to dried out grease and dirt. Cleaning everything should make it run again. You should not submerge the entire shutter or flood it with solvent. The shutter blades are not made of metal and can swell if they get wet.
The entire shutter is disassembled from the front and can often be worked on without removing it from the camera or lens board. It may not be necessary to completely disassemble the shutter. By removing everything down to the shutter cover, you can flush clean the escapement and trigger and often that is all that is needed. However, the diaphragm will often be very stiff due to dried out grease. You have to disassemble everything to clean and lubricate it.
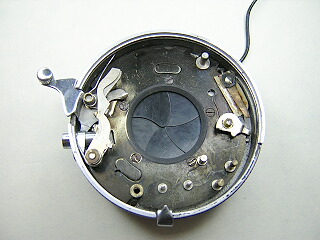
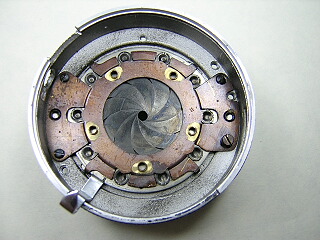
The shutter shown below is from an early Ciro-flex. There are variations on the faceplate, but the shutter is the same. I've seen two of these shutters with after-market flash synchronizers. If you see wires inside the shutter, that's probably what you have.
 |
Remove the front and rear lenses then remove the two screws in the faceplate and lift it off.
|
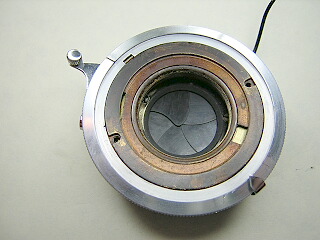 |
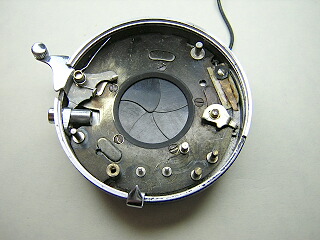
Remove the spacer and speed setting ring. Slide the speed ring sideways to clear the aperture pointer. It may be necessary to pull the aperture pointer out slightly to get the speed ring off.
|
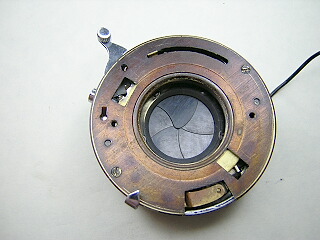 |
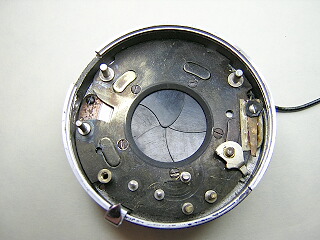
Remove the two screws from the top cover and lift the cover off. Turn the cover over and you will see two brackets that hold the speed setting cam. Loosen the screws on the brackets, turn them out and then remove the cam for cleaning and lubrication.
Remove the cover over the escapement.
|
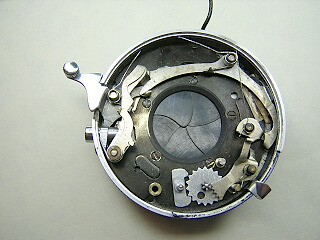 |
At this point you may be able to just flush clean the escapement and trigger without any further disassembly.
Sometimes the main activating lever is bent and doesn't engage the sector gear properly. This will cause the slow speeds to be fast or cause the shutter to hang. Bend the end that drags across the blade activating lever to get the speeds back to the correct range.
Unhook the long end of the spring on the blade activation lever and remove the spring.
Unhook the short end of the main spring and remove the spring. Remove the main activating lever.
Unhook the spring on the sector gear and lift out the sector gear, star wheel and pallet.
|
 |
Remove the T and B levers. When lifting them out, lift from the bushings. These pieces are thin metal and easy to bend if you lift on the levers themselves.
(Note that the spring for the T lever sits against the cable release socket. In the picture, this spring is displaced.)
|
 |
Unhook the short end of the shutter trigger spring. Rotate trigger so that it clears the cable release socket and lift it out.
Remove the screw in the side of the shutter that holds the cable release. Rotate the cable release and slide it out.
|
 |
Remove the 5 screws holding the shutter base and lift the base out. It isn't necessary to remove the flash contact, but it makes it easier to reassemble if the flash wire is not attached.
|
 |
Remove the shutter blades and blade drive ring. The blades are be made of what seems like cardboard but is probably hard rubber. When cleaning the blades, wipe them off with a paper towel.
|
 |
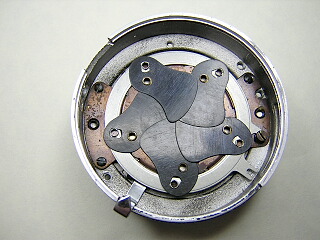
Remove the four screws holding the diaphragm and lift the diaphragm out as a unit. Flush clean the diaphragm without disassembly.
Note that the lower right screw is different. This screw acts as a stop for the blade activating ring.
|
Notes
Lubricate the edge of the diaphragm ring where it rubs against the holder.
Lubricate the edge of the shutter trigger where it rubs against the main lever and also where the main lever drags across the shutter base. The escapement can run dry, or, if needed you can put a tiny amount of oil on the gear spindles.
Lubricate the speed setting cam surface that contacts the shutter cover
Lubricate the speed setting ring where it rubs against the shutter cover and faceplate.
When installing the shutter cover make sure the T and B tabs and the sector gear tab fit into the appropriate slots.
When installing the speed setting ring, make sure the notch fits onto the speed cam tab.
|